~And so, without delay, here is the skinny jean tutorial! I tried to take good step by step photos, but is you have any questions be sure to comment!~
Start with a pair of jeans you like. It is best if the jeans have some spandex in them, the ones I used have 2%. The stretch factor comes in handy if you want to be comfortable in skinny jeans! (You do not have to have stretch jeans for this project, I have done several pairs of normal jeans for my brother with success. But it is advisable to use stretch jeans unless you are planning on ripping out the knees or walking like chopsticks.) My jeans are regular straight leg jeans, I suppose you could wing it with a pair of bootleg or bell bottoms - if I ever try it I'll post pictures!
I have altered several pairs of really baggy boys jeans where I took it all the way up and around without stopping. Essentially it made a really skinny jean. This one is less drastic.
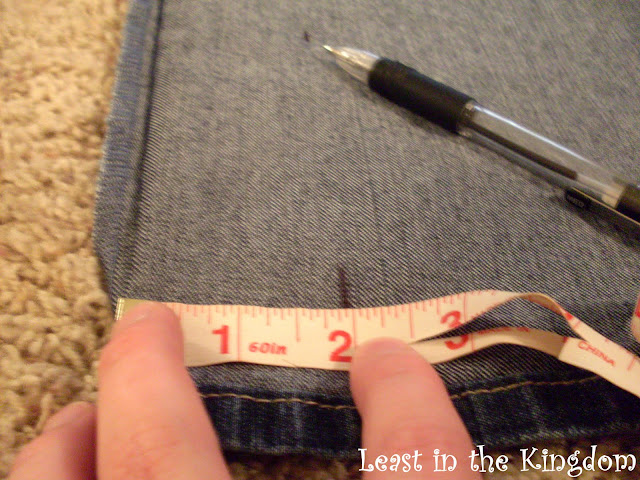
I decided to take off 2" on the bottom of my jeans. Using a black ball point pen and your sewing tape mark 2' from the inner seam. Pin it well - you don't want to have a crooked hem! Make sure both layers of jean line up.
As you can see in the picture, your line will gradually come closer and closer to the original manufacturers seam. This is the 16" pin I have marking my "finish line". I used my eyeballs to decrease the width, if you want to figure out a mathematical formula be my guest! Post your results in the comments for everyone to benefit by...
Here is the finished line. Keep in mind that this is your "rough draft". It is easy to overestimate how skinny we want the jeans to be. Its always better to underestimate and sew a wider seam over the other one in the end, than to rip out seams and start over! (Voice of experience speaking here!)
Take it to the machine and sew down your marked line. Be careful to follow the pattern! Jeans are thick, especially on the hem line. Go very slowly and stop at the first sign of trouble. Choose the appropriate needle for thicker material before starting, otherwise you'll end up like me with a broken needle! ( Again, it was my brothers thicker less give jeans - I had NO problems with stretch jeans!)
VERY IMPORTANT!!!! Try on your jeans to determine fit BEFORE cutting off the excess fabric! I think this is pretty obvious, but, you never know.Its easy to get excited and forget. After trying on your jeans and determining if they are too loose, too tight, or just right, cut off near the new seam leaving a little room for unraveling. You can serge or otherwise finish off the edge if you want, but I don't bother. I haven't found that jeans unravel too much. (If your jeans are too tight in the try on; get out the seam ripper and start over.Too loose? Simply make another seam a little closer to the leg area, using your previous seam as a guide.)
The finished results... A jean that is skinny at the bottom and loose on the top. Yours will look different from mine depending on how loose/tight you make them.
I'm enjoying my new pair of jeans and I hope you enjoyed seeing the process!


No comments:
Post a Comment